
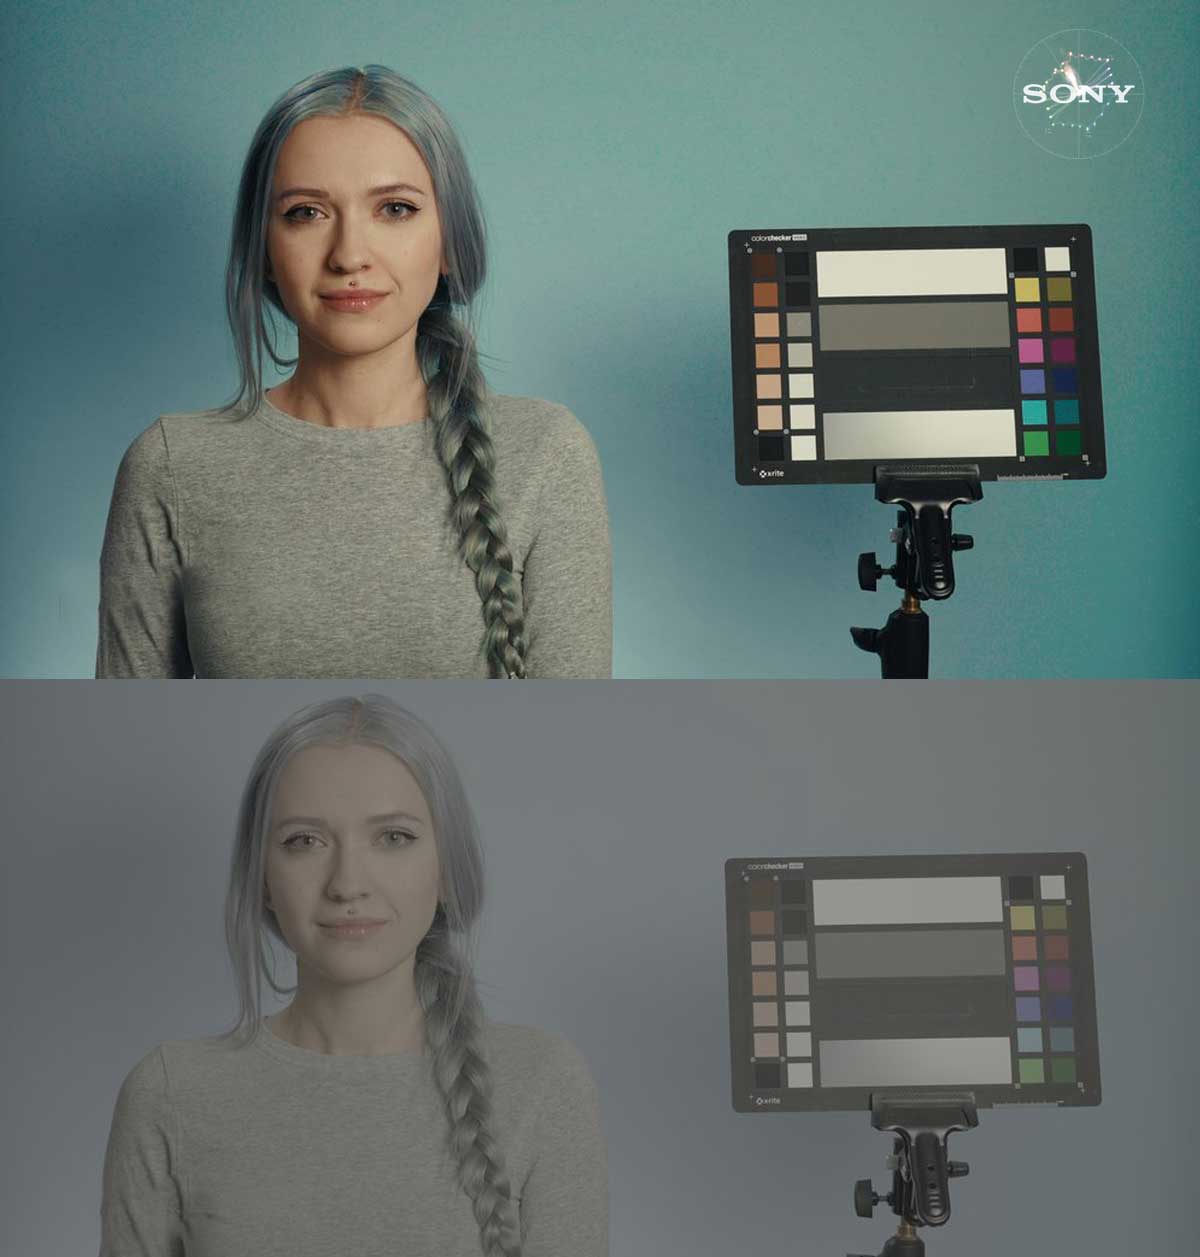
索尼s-log3转换rec.709转换lut 这是一套由 出品的索尼s-log3转换rec.709的转换lut,色彩准确、可加载到相机或监视器,全面优于其他的转换lut,索尼党必备 ,非常值得学习与借鉴,收藏备用!
this pack contains technical luts for transforming sony s-log3 / s-gamut3.cine footage to rec. 709 with enhanced color accuracy.
此软件包包含用于将 sony s-log3 / s-gamut3.cine 素材转换为 rec. 709 的技术 lut,并增强色彩精度。
what’s included: 包含内容:
in this pack, you’ll find separate folders for different cameras. these each have specific tweaks to achieve the best color accuracy for their respective sensors. there’s also a folder called general purpose, which works well on cameras i haven’t yet customized. but because each sensor does have minor color variations, i’ll continue to create camera-specific luts and will send those out to customers of this pack as a free upgrade when they’re complete. in the meantime, for any other sony camera, simply use the general purpose s-log3 luts, which will still provide accurate, neutral color.
在这个素材包中,你会找到针对不同相机的独立文件夹。每个文件夹都针对其各自的传感器进行了特定的调整,以实现最佳的色彩准确度。此外,还有一个名为 “通用” 的文件夹,适用于我尚未定制的相机。但由于每个传感器都存在细微的色彩差异,我会继续创建相机专属的 lut,并在完成后免费提供给此素材包的用户。在此期间,对于其他索尼相机,只需使用“通用”s-log3 lut 即可,它仍然能够提供准确、中性的色彩。
contains: 包含:
- general purpose 通用
- a1
- a1 ii
- a9 iii
- a7 iv
- a7 v
- a7c ii
- a7r v
- a7r vi
- a7c r
- a7s iii
- a6700
- fx2
- fx3
- fx5
- fx6
- fx30
- zv-e1
- zv-e10 ii
file names explained: 文件名解释:
– s-log3 undone 65: accurate, fully saturated color with a custom curve to give a finished look with one step. use in post-production.
精准、饱和度高的色彩,采用自定义曲线,一步即可获得最终效果。适用于后期制作。
– s-log3 undone 33 (monitoring): same as above, but made compatible for loading into a camera or monitor.
(监看): 与上述相同,但兼容加载到摄像机或监视器中。
– s-log3 undone lc 65: accurate neutral color with no changes to curve. better for high contrast scenes. lc = low contrast. use in post and add contrast to taste.
色彩准确中性,曲线未做任何调整。更适合高对比度场景。lc = 低对比度。可在后期制作中使用,并根据需要增加对比度。
– s-log3 undone lc 33 (monitoring): same as above, but made compatible for loading into a camera or monitor.
(监看): 与上述相同,但兼容加载到摄像机或监视器中。
exposure & tips: 曝光与技巧:
expose neutrally. these luts are built on correct exposure principles from sony’s whitepapers, which state that 18% gray should be exposed to 41% (10-bit code value of 420).this also matches the in-camera view assist and exposure tools, so you can rely on them as well.
中性曝光。这些 lut 基于索尼白皮书中正确的曝光原则构建,其中指出 18% 的灰度应曝光至 41%(10 位代码值为 420) 。这与相机内的取景辅助和曝光工具也一致,因此您可以信赖它们。
if you’re applying the lut to over or underexposed footage, it’s recommended that you adjust the exposure in an earlier step in your color workflow before applying the lut. in davinci resolve for instance, this would mean putting an exposure adjustment node before the lut node.
如果要将 lut 应用于曝光过度或曝光不足的素材,建议在应用 lut 之前,先在调色工作流程的早期步骤中调整曝光。例如,在 davinci resolve 中,这意味着在 lut 节点之前添加一个曝光调整节点。
it’s good practice to place this lut near the end of your color pipeline. this will make adjustments to exposure, white balance, saturation, and other parameters more consistent and allow you to recover more information when compared to attempting to adjust those things after the lut is applied.
将此 lut 放置在色彩流程的末端是一个不错的做法。这样可以使曝光、白平衡、饱和度和其他参数的调整更加一致,并且与在应用 lut 后尝试调整这些参数相比,可以恢复更多信息。
luts信息:
适用系统:windows 和 mac 系统
支持软件:与sony vegas,premiere pro cc,after effects cc,fcpx,davinci resolve等兼容。
文件格式:.cube格式
素材大小:约96mb
传送格式:.zip文件
索尼s-log3转换rec.709转换lut 图文介绍
如何在final cut pro x中加载luts?
打开fcpx软件,找到【效果】面板-【颜色】-【自定lut】添加到影片上

在【lut】参数项-【选取自定义lut…】选取要加载的luts文件夹或者.cube文件。
ps:如果选择luts文件夹,即可将整个文件夹加载,并在【lut】参数项保留,方便分类管理,但是注意尽量不要使用中文及特殊字符。
如何在premiere pro中加载luts?
首先打开下方路径:
mac 系统: /library/application support/adobe/common/luts
windows 系统: \program files\adobe\common\luts
拷贝 例如“log to rec709” luts到上述文件夹内.
ps:为方便归类,自己可以在上方路径下创建新的文件夹。
如何在davinci resolve中加载luts?
首先打开下方路径:
mac 系统: macintosh hd/library/application support/blackmagic design/davinci resolve/lut
windows 系统: c:\programdata\blackmagic design\davinci resolve\support\lut
拷贝 例如“log to rec709” luts到上述文件夹内即可.
相关使用参考及管理工具:
red giant magic bullet suite 2023.2.1 红巨人降噪磨皮调色插件套装 mac版本